Sunday, March 11, 2018

Deploying a Mule application from Anypoint Studio to the Mule ESB server.

Overview


These instructions assume that you have a Mule project that you want to export in the Anypoint Studio and the Mule server is up and running. In this example Mule runtime is installed to the C:\Mule -directory.

For Mule runtime installation see http://integrationstuff.blogspot.fi/2018/03/installing-and-running-mule-esb.html


Instructions


Right click on the project and select "Export".


Select "Anypoint Studio Project to...".


Select the directory where you want to export the package.


A zip package is created to the c:\Temp -directory.


This is not really mandatory, but you might want to stop the Mule service to prevent any problem with the deployment (Mule service trying to read in the zip before it's fully copied to the apps dir).


Copy the zip to the C:\Mule\apps -directory.


Start the Mule service.


An anchor file for the app is created.


Check the "C:\Mule\logs\mule.log".


Test the integration. Put a txt file to the "C:\Temp\in" -directory.

From the "C:\Mule\logs\myfirsttestproject.log" you can see what happended to the file and if there were any errors.


Congratulations, you have successfully deployed a Mule app.

If you want to undeploy the app, just delete the anchor file "C:\Mule\apps\myfirsttestproject-anchor.txt". Mule automatically removes the app from "C:\Mule\apps" when the achor file is not present.


The first Mule ESB project / application / integration

Overview


These instructions assume that you have AnyPoint Studio up and running.
In this example you create a Mule app that transfers *.txt files from a directory to another and archives the source files.

Instructions


First you'll want to install Community runtime. Go to Install New Software and expand Anypoint Studio Community Runtimes and select the runtime you want.


Once the Community runtime is installed you are ready to create your first application.

Close the welcome page.


Right click on the blank area of Package Expolorer, select New and Mule Project.


Give a name and select the CE runtime.


A blank project is created.


Type 'file' in the search box. Drag the File element to the blank space.


Create directories c:\temp\in, c:\temp\in\archive and c:\temp\out.

In the File element define the paths. When the paths are ok, click the plus icon to add a filter.


Define the filter and set it not to be case sensitive.


This is what you should see now.


Drag another File element next to the first one. Define the path to be C:\Temp\out. Save the project.


On the myfirsttestprojectFlow right click and select "run project myfirsttestproject".


The project is now running.


Put a txt -file to the C:\Temp\in -directory. Polling frequency was 1000 (=1 sec) so the file is quickly transferred to the C:\Temp\out and C:\Temp\in\archive -directories.


Installing and running Mule ESB Community Edition runtime


Overview


Basic steps to install Mule ESB Community Edition runtime and get it kickin'.

Instructions


Get and install Java JDK, must be 32 bit:
http://www.oracle.com/technetwork/pt/java/javase/downloads/jdk8-downloads-2133151.html
Select jdk-8u161-windows-i586.exe

Get Mule Community Edition Runtime from:
https://developer.mulesoft.com/download-mule-esb-runtime

Once you have downloaded the zip package (mule-standalone-n.n.n.zip), extract it.

Rename the directory from "mule-standalone-3.9.0" to "Mule".

Copy the 'Mule' directory to the C: -drive. This is what you should see now:


Run CMD as Administrator and "cd c:\mule\bin".
Enter command "mule". Mule should start.


Use "CTRL+C" to stop Mule. Terminate batch job (Y/N)? y

To install Mule as a service, enter the "mule install" command.


To be able to run Mule as a service, you'll need an account for Mule.

Go to Computer Management


Right click on the Users directory and select "New User"


Create a new user. Note the checkboxes.


Grant 'Modify' rights for the 'mule' user to the C:\Mule -directory.


If you get errors, go to the Advanced settings. First go to Auditing and click Continue. This will make you run the settings as an administrator.


Then replace the permissions in the sub directories.


Go to the 'mule' service and set the account and the password.


After a few seconds check the "C:\Mule\logs\mule.log" file that Mule is live and kickin'.


Notes


If you run into issues remember that the 'mule' user must have rights to directories where integrations are pointing. You could put the 'mule' user to the administrators group for example when testing if local directories are involved. In a 'real life' scenario the Mule service should run under a service account defined in AD, but that's a different story.


Monday, February 26, 2018

Setting up IBM DataPower Gateway in Docker for Windows

Overview


You can run DataPower (https://www-03.ibm.com/software/products/fi/datapower-gateway) in Docker on your own computer to do integration development and test the features of DataPower.

If you are using a VPN connection, it might cause an issue so the best bet is to disconnect it while installing or using Docker.

Instructions


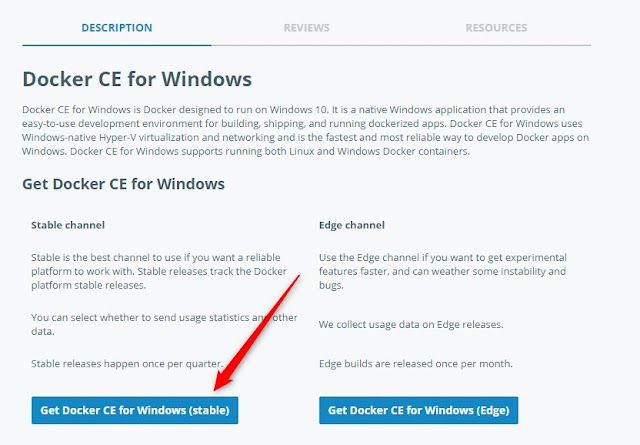
Download Docker from https://www.docker.com/docker-windows (https://store.docker.com/editions/community/docker-ce-desktop-windows) and install it.


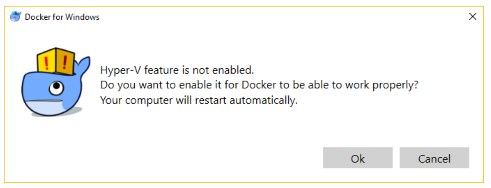
If you don't already have Hyper-V feature enabled, you'll get the following message. Click OK. You need to have virtualization enabled on the mother board also.


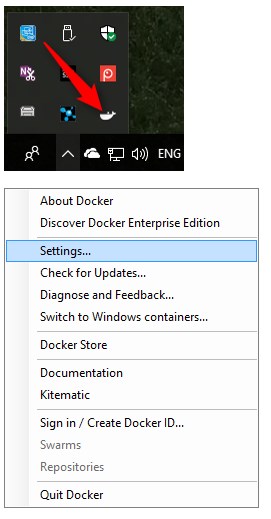
In the system tray you'll see the Docker whale icon. Right click it and select 'Settings'.

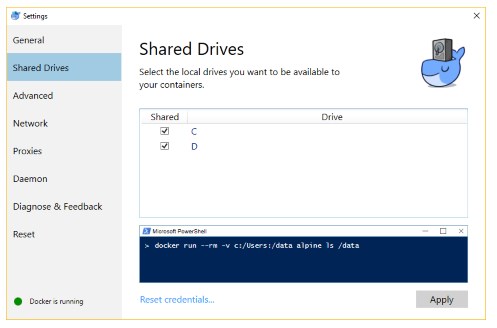
In setting you'll need to share at least one drive.


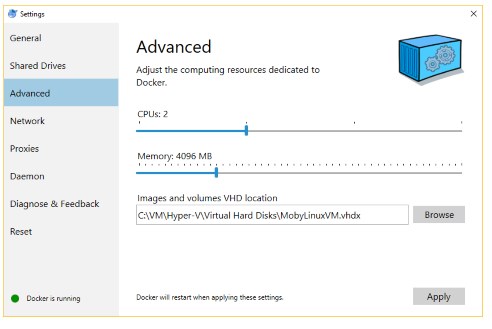
Set allocated memory to be at least 4096 MB. Apply changes.


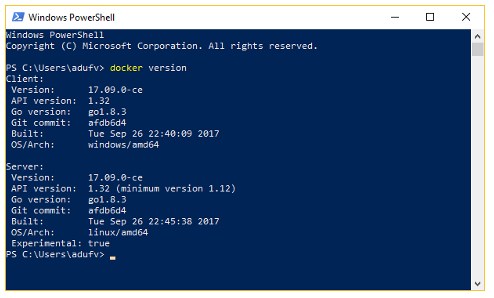
Open cmd or Powershell and type 'docker version' to see Docker is in the path and you are ready to continue.


Pull the DataPower image with the command "docker pull ibmcom/datapower".


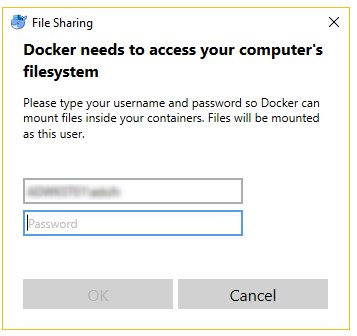
Enter you username/password.


In cmd type command:

docker run -it -v $PWD/config:/drouter/config -v $PWD/local:/drouter/local -e DATAPOWER_ACCEPT_LICENSE=true -e DATAPOWER_INTERACTIVE=true -p 9090:9090 --name mydockerdp ibmcom/datapower

If you need to access xml management interface on the DataPower (when using Apache Ant for example) you'll want to use the following command instead:

docker run -it -v $PWD/config:/drouter/config -v $PWD/local:/drouter/local -e DATAPOWER_ACCEPT_LICENSE=true -e DATAPOWER_INTERACTIVE=true -p 9090:9090 -p 5550:5550 --name mydockerdp ibmcom/datapower

If you need to be elevated do use an absolute path (in this example also many ports are mapped):

docker run -it -v C:/Docker/idg01/config:/drouter/config -v C:/Docker/idg01/local:/drouter/local -e DATAPOWER_ACCEPT_LICENSE=true -e DATAPOWER_INTERACTIVE=true -p 9090:9090 -p 5550:5550 -p 8080:8080 -p 8081:8081 -p 8082:8082 -p 8083:8083 -p 8084:8084 -p 8085:8085  --name idg01 ibmcom/datapower

"C:/Docker/idg01/config:/drouter/config -v C:/Docker/idg01/local:/drouter/local" means that DataPower configuration and files under local -directory are stored in the C:\Docker directory on your computer to maintain the state of DataPower when Docker/DataPower is not running.

"-p 9090:9090" for example means that on your computer you can call localhost:9090 and it's redirected to the Datatapower port 9090

On the lower right corner of the desktop you might get a message:

Docker for Windows - Share drive
Docker wants to access drive….
Do you want to share it?

Click "Share it".


Use 'admin' as username and 'admin' as password to log in to DataPower.
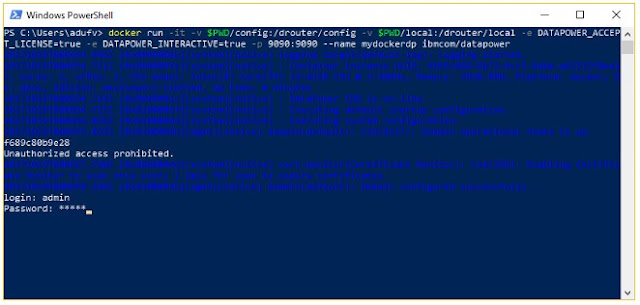


Next you'll need to configure web management to be able to connect with a browser.

The commands:
co
web-mgmt 0 9090 9000


After entering the commands you'll might need to push enter to get back to the prompt.


Save the configuration change with "write mem". You'll need to push enter to get back to the prompt.


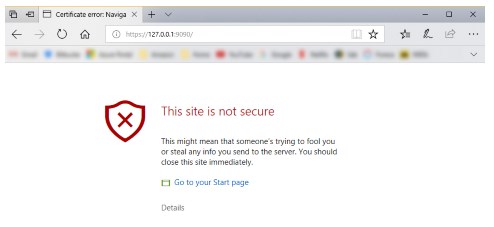
In the browser go to the address 'https://127.0.0.1:9090".


In the Edge browser click 'Detail' and then 'Go on to the webpage (Not recommended)'
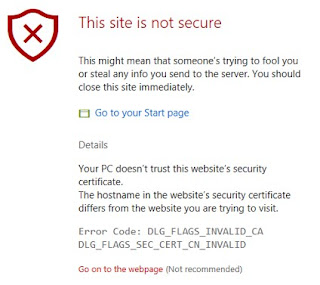


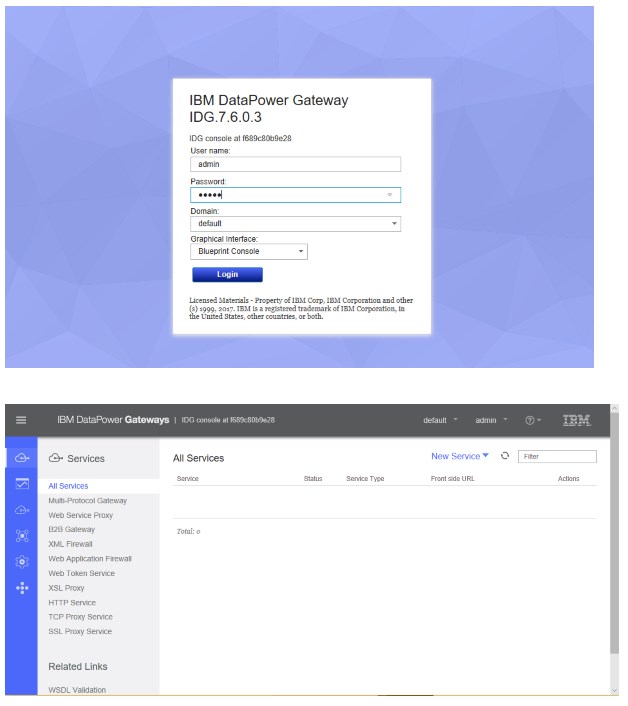
Use admin/admin to log in.


Some useful commands for Docker

Show containers: docker ps -a



Stop container: docker stop mydockerdp

Start container:  docker start mydockerdp