Wednesday, March 21, 2018

Setting up SFTP server on Ubuntu

Overview


In this example we are using Ubuntu application running on Windows 10, but the instructions can be used to set up an SFTP server on any Ubuntu system.

Instructions


On Windows 10 get Ubuntu from the Microsoft Store
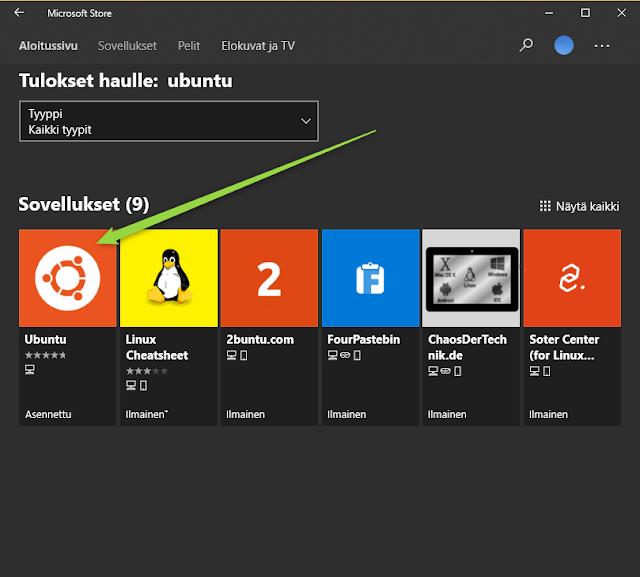


After installing Ubuntu go to the terminal:


1. Make a copy of the original config file

sudo cp /etc/ssh/sshd_config /etc/ssh/sshd_config.factory-defaults

sudo chmod a-w /etc/ssh/sshd_config.factory-defaults

2. Add the 'sftponly' group


sudo groupadd sftponly

3. Edit the /etc/ssh/sshd_config -file


sudo nano /etc/ssh/sshd_config

In the /etc/ssh/sshd_config -file find a row "PasswordAuthentication" and set it to 'Yes'


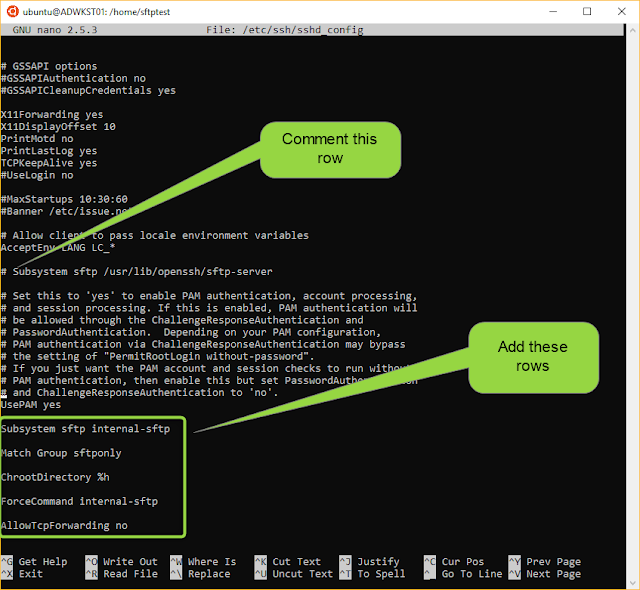
Comment out the existing Subsystem sftp command.

To the end of the /etc/ssh/sshd_config add the rows:

Subsystem sftp internal-sftp
Match Group sftponly
ChrootDirectory %h
ForceCommand internal-sftp
AllowTcpForwarding no

Save the changes: CTRL + O + [ENTER]
Exit nano: CTRL + X


4. Create the sftptest -user, put it to the sftponly -group, create directories and set the rights:


Do not use users already existing in the system.
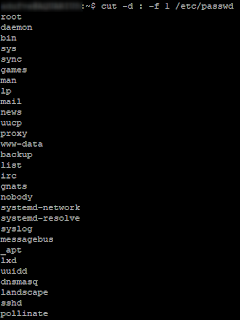
Use the command cut -d : -f 1 /etc/passwd  to get a list of existing users.


sudo mkdir /home/sftptest
sudo useradd -d /home/sftptest -M -N -g users sftptest
sudo passwd sftptest

[enter password] abcABC123!!!

sudo chown root:root /home/sftptest
cd /home/sftptest
sudo mkdir files
sudo chown sftptest:users /home/sftptest/files
sudo usermod sftptest -g sftponly
sudo usermod sftptest -s /bin/false

5. Restart the ssh service


sudo service ssh restart

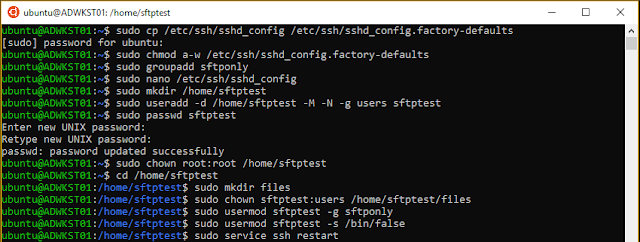
In the end this is what you should see:


6. Get the IP address for the Ubuntu instance


Enter the command: ifconfig

In this case the IP address we want is the one for eth1
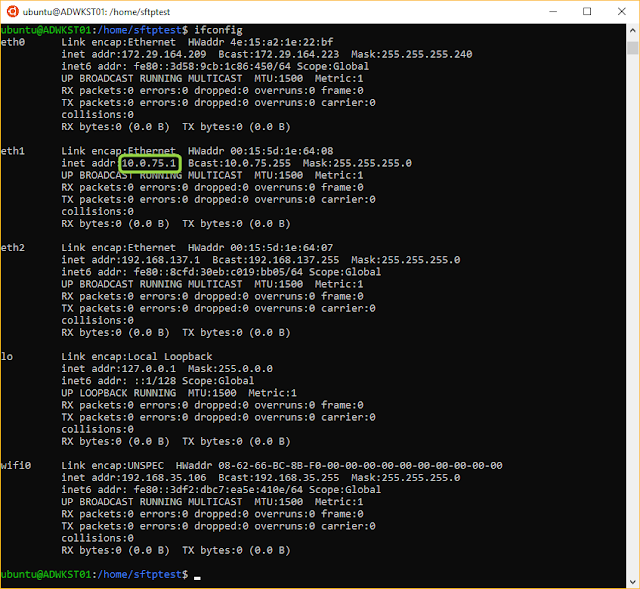


Now you can test connection using telnet:


If the connection works you should see something like this:


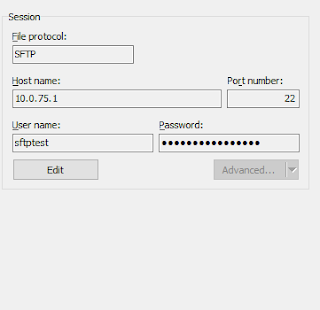
Use WinSCP or such to connet to the sftp server:


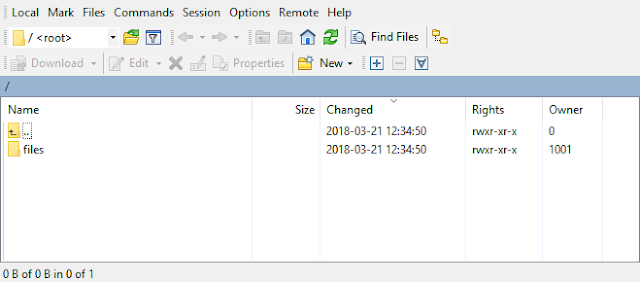
You should now see a 'files' -directory that you can use to store data.


When you close the Ubuntu application and start it again you must restart the ssh service with the command "sudo service ssh restart".

Sunday, March 11, 2018

Mule XML to CSV transformation

Overview


In this example you modify the test project created in https://goo.gl/e3tVjG to make a simple XML to CSV transformation.


Instructions


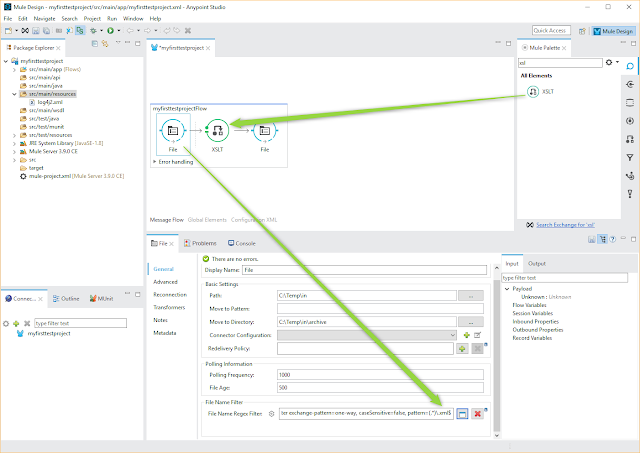
Use the test project (https://goo.gl/e3tVjG) as a template. First define the input pattern to be (.*)\.xml$

Search and drag an XSLT element between the File elements.

Change the inbound File element filter to (.*)\.xml$


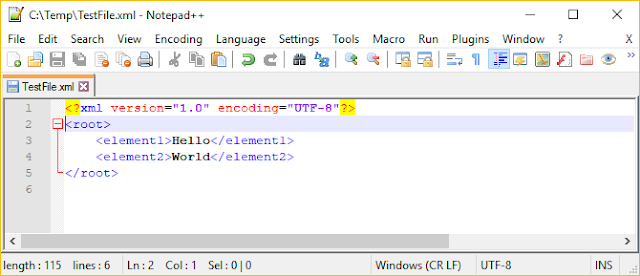
Create a test XML file.

<?xml version="1.0" encoding="UTF-8"?>
<root>
<element1>Hello</element1>
<element2>World</element2>
</root>


Create an XSL file by name TransformationTest.xsl

<?xml version="1.0" encoding="UTF-8"?>
<xsl:stylesheet version="1.0" xmlns:xsl="http://www.w3.org/1999/XSL/Transform" xmlns:fo="http://www.w3.org/1999/XSL/Format">
<xsl:output method="text" encoding="UTF-8"/>
<xsl:template match="/">
<xsl:value-of select="/root/element1"/>
<xsl:text>;</xsl:text>
<xsl:value-of select="/root/element2"/>
</xsl:template>
</xsl:stylesheet>


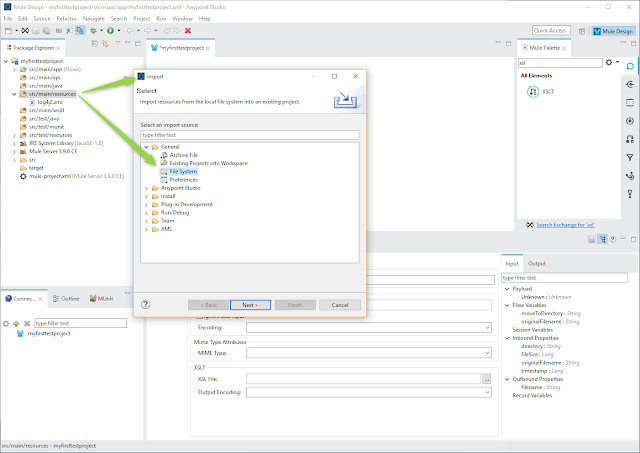
Right click on the src/main/resources directory and select Import. Select "File System"


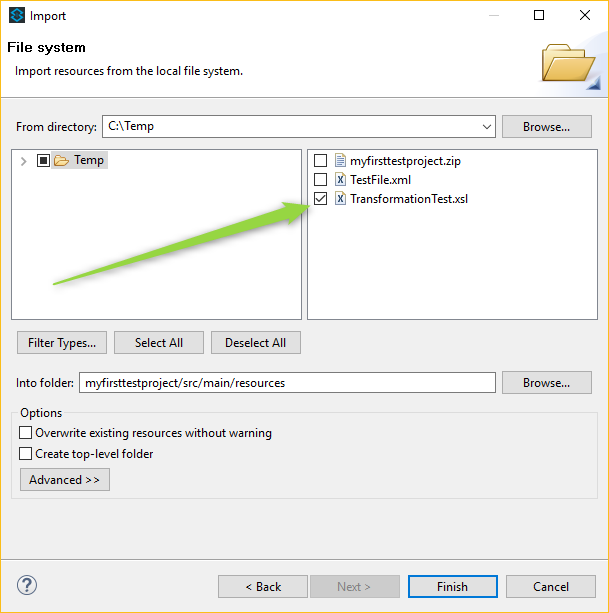
Import the XSL -file.


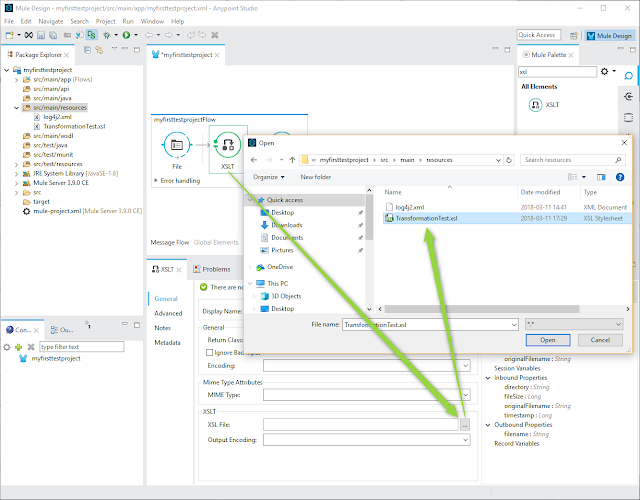
In the XSLT elment select the XSL -file.


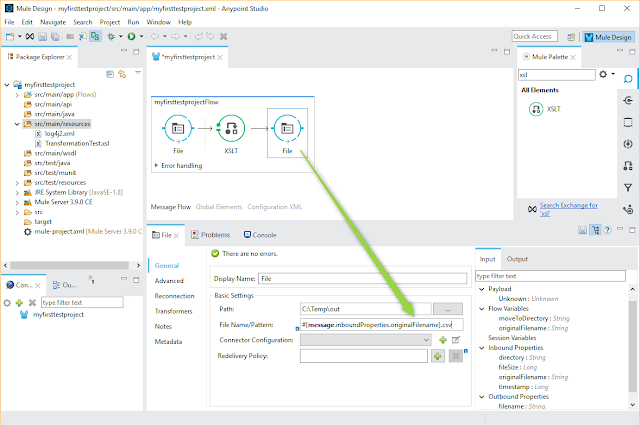
To the outbound File element define #[message.inboundProperties.originalFilename].csv as the File Name/Pattern.


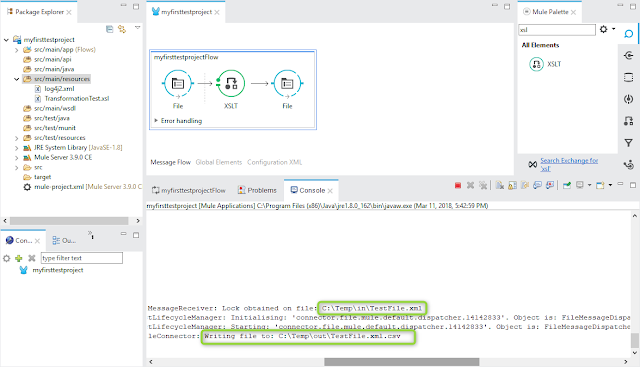
Save the project and run it (right click on the myfirsttestprojectFlow abd sekect "Run project..." ).

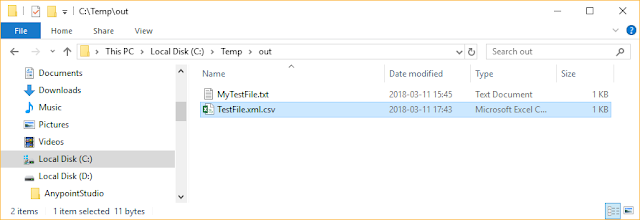
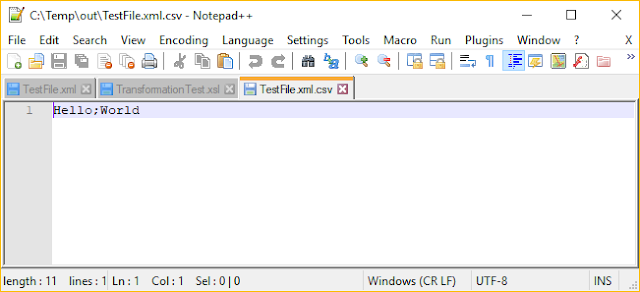
Put the test XML file to the C:\Temp\in -directory. Mule reads in the file, makes the transformation and creates a CSV file.


Deploying a Mule application from Anypoint Studio to the Mule ESB server.

Overview


These instructions assume that you have a Mule project that you want to export in the Anypoint Studio and the Mule server is up and running. In this example Mule runtime is installed to the C:\Mule -directory.

For Mule runtime installation see http://integrationstuff.blogspot.fi/2018/03/installing-and-running-mule-esb.html


Instructions


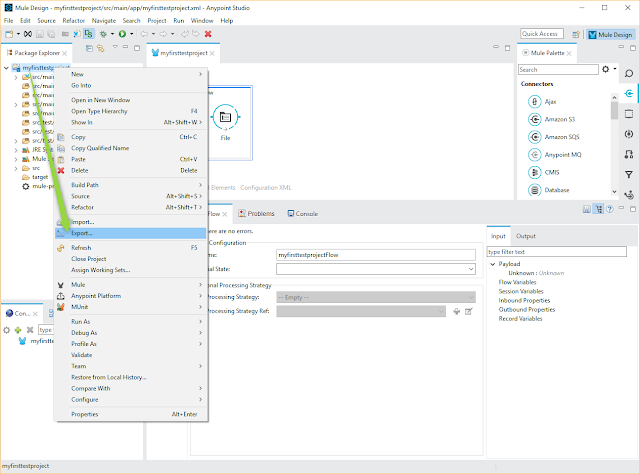
Right click on the project and select "Export".


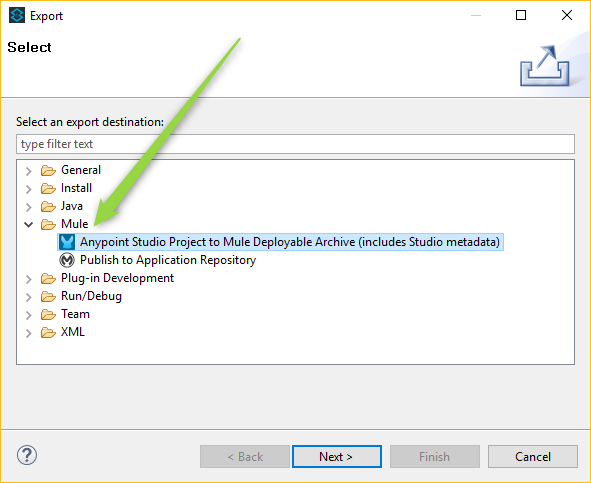
Select "Anypoint Studio Project to...".


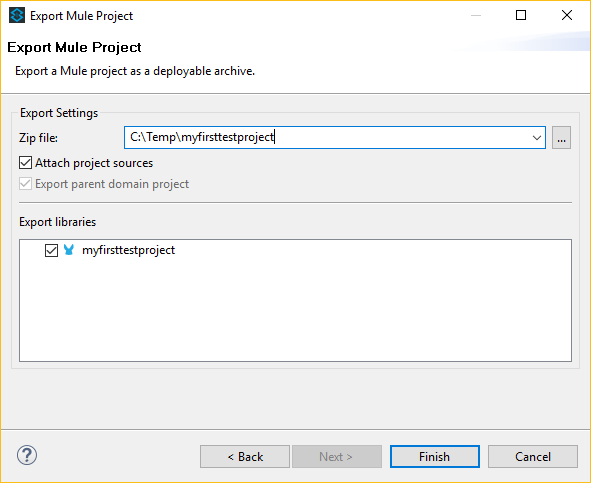
Select the directory where you want to export the package.


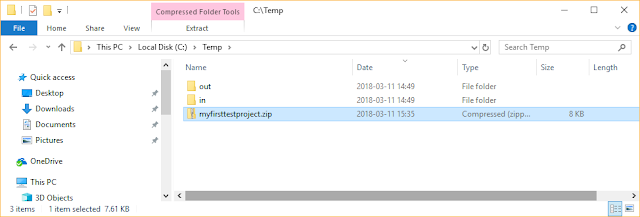
A zip package is created to the c:\Temp -directory.


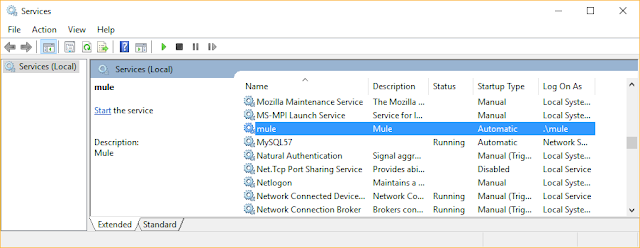
This is not really mandatory, but you might want to stop the Mule service to prevent any problem with the deployment (Mule service trying to read in the zip before it's fully copied to the apps dir).


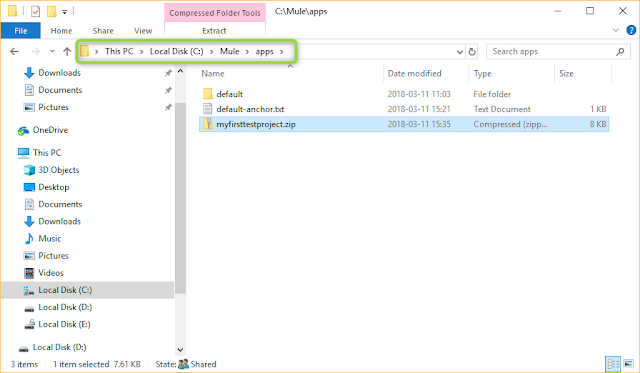
Copy the zip to the C:\Mule\apps -directory.


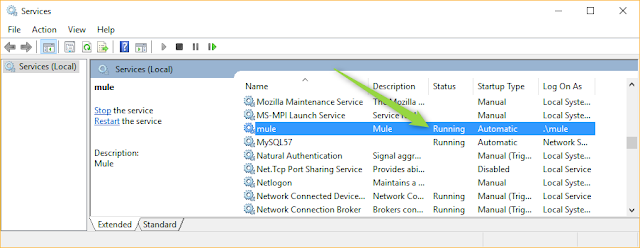
Start the Mule service.


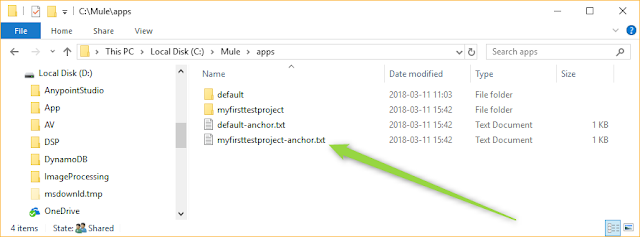
An anchor file for the app is created.


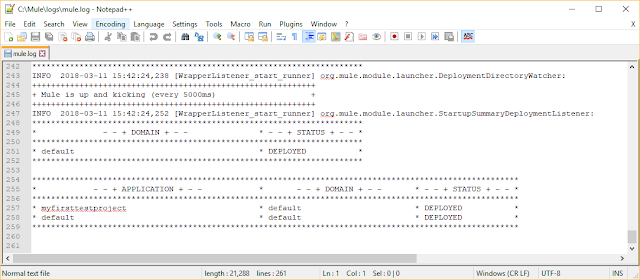
Check the "C:\Mule\logs\mule.log".


Test the integration. Put a txt file to the "C:\Temp\in" -directory.

From the "C:\Mule\logs\myfirsttestproject.log" you can see what happended to the file and if there were any errors.


Congratulations, you have successfully deployed a Mule app.

If you want to undeploy the app, just delete the anchor file "C:\Mule\apps\myfirsttestproject-anchor.txt". Mule automatically removes the app from "C:\Mule\apps" when the achor file is not present.


The first Mule ESB project / application / integration

Overview


These instructions assume that you have AnyPoint Studio up and running.
In this example you create a Mule app that transfers *.txt files from a directory to another and archives the source files.

Instructions


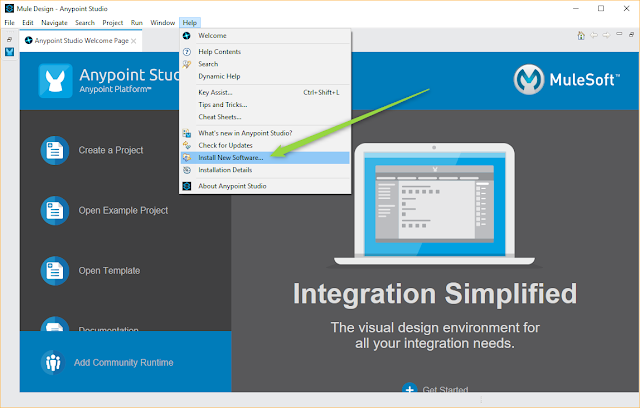
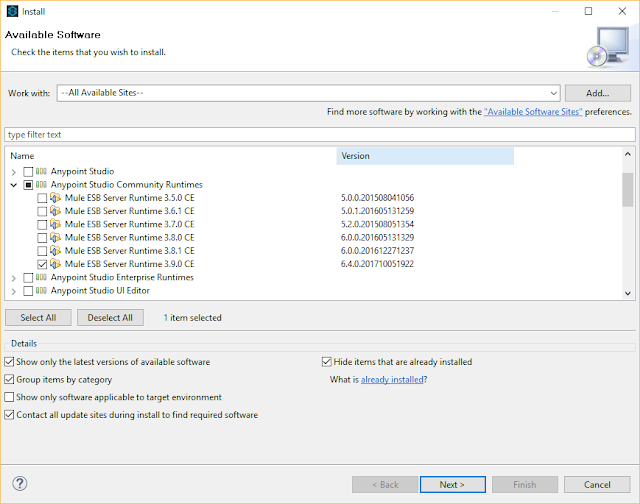
First you'll want to install Community runtime. Go to Install New Software and expand Anypoint Studio Community Runtimes and select the runtime you want.


Once the Community runtime is installed you are ready to create your first application.

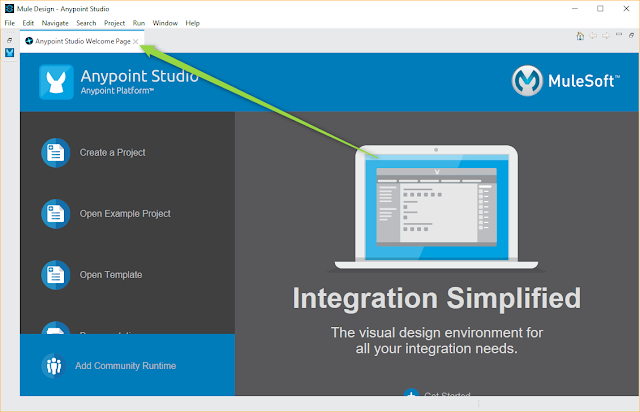
Close the welcome page.


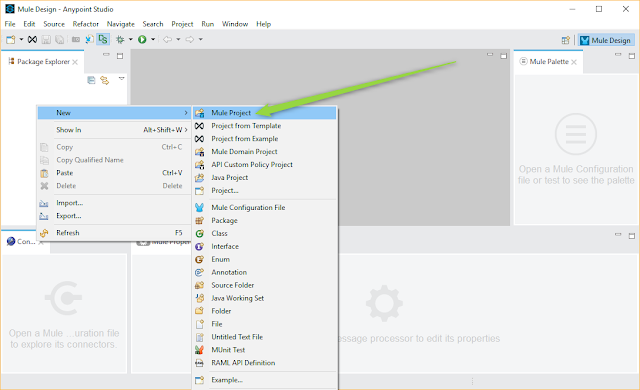
Right click on the blank area of Package Expolorer, select New and Mule Project.


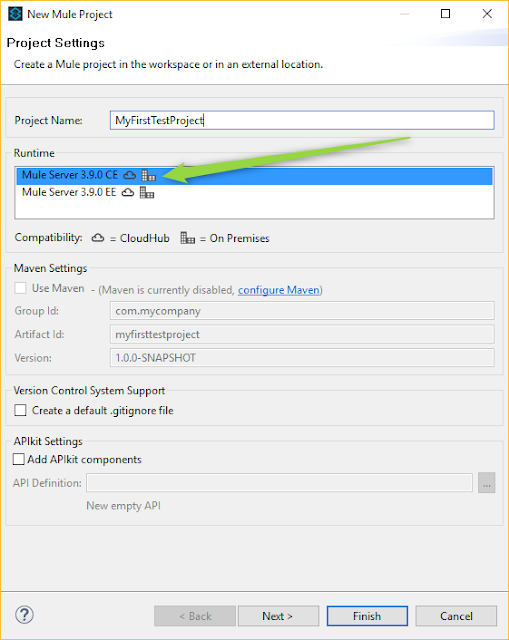
Give a name and select the CE runtime.


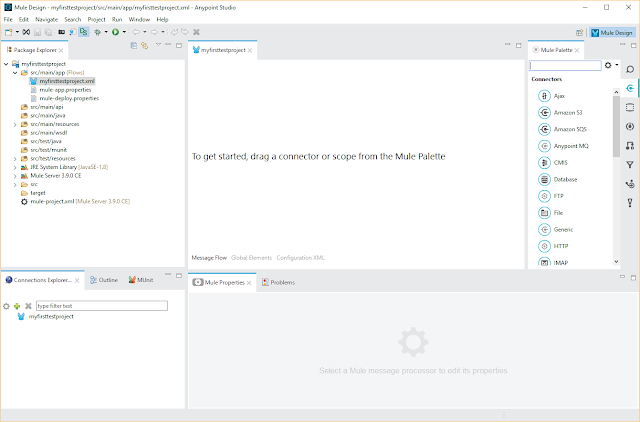
A blank project is created.


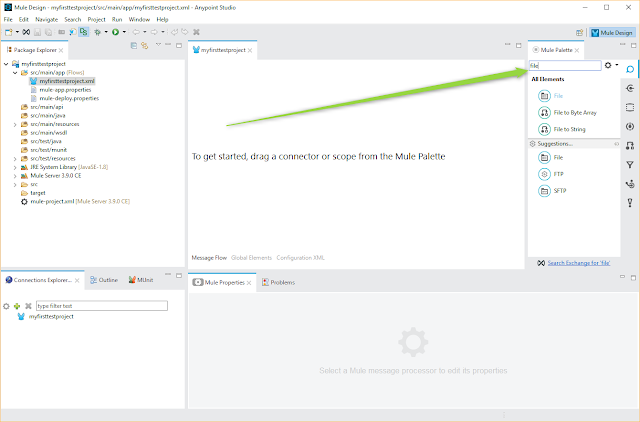
Type 'file' in the search box. Drag the File element to the blank space.


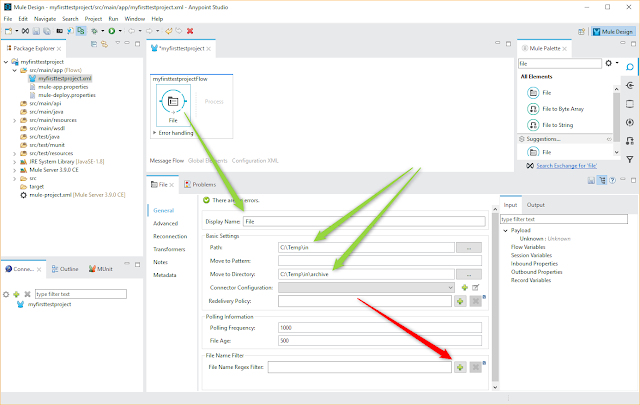
Create directories c:\temp\in, c:\temp\in\archive and c:\temp\out.

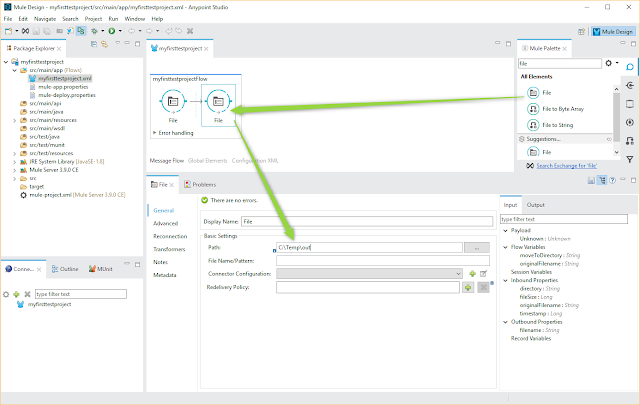
In the File element define the paths. When the paths are ok, click the plus icon to add a filter.


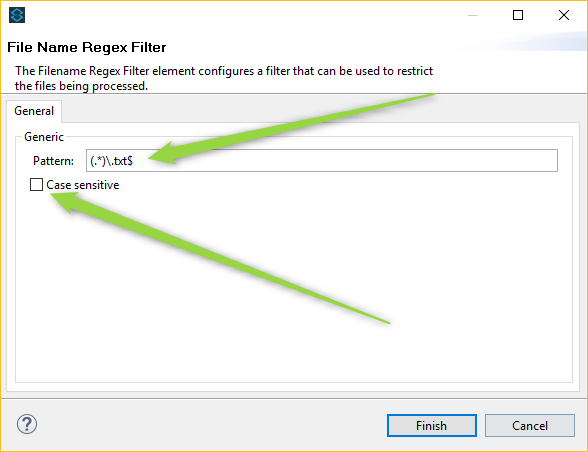
Define the filter and set it not to be case sensitive.


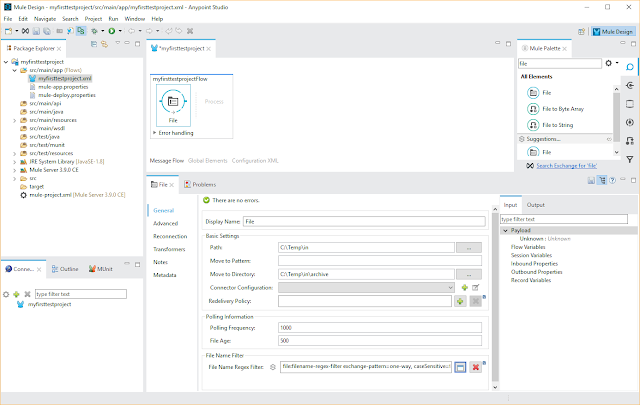
This is what you should see now.


Drag another File element next to the first one. Define the path to be C:\Temp\out. Save the project.


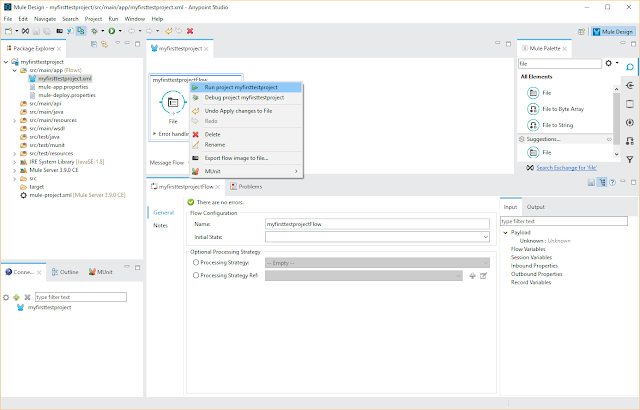
On the myfirsttestprojectFlow right click and select "run project myfirsttestproject".


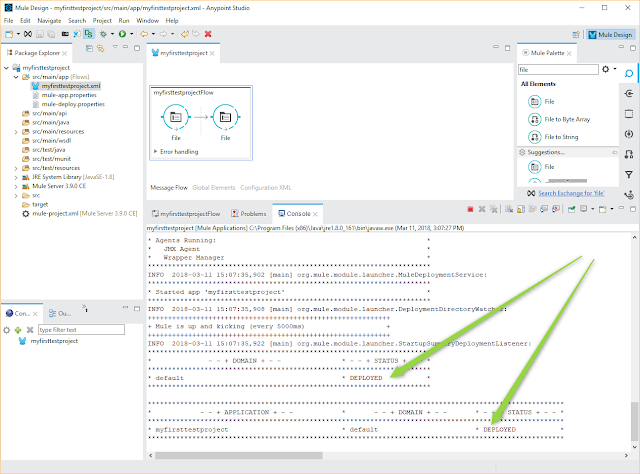
The project is now running.


Put a txt -file to the C:\Temp\in -directory. Polling frequency was 1000 (=1 sec) so the file is quickly transferred to the C:\Temp\out and C:\Temp\in\archive -directories.


Installing and running Mule ESB Community Edition runtime


Overview


Basic steps to install Mule ESB Community Edition runtime and get it kickin'.

Instructions


Get and install Java JDK, must be 32 bit:
http://www.oracle.com/technetwork/pt/java/javase/downloads/jdk8-downloads-2133151.html
Select jdk-8u161-windows-i586.exe

Get Mule Community Edition Runtime from:
https://developer.mulesoft.com/download-mule-esb-runtime

Once you have downloaded the zip package (mule-standalone-n.n.n.zip), extract it.

Rename the directory from "mule-standalone-3.9.0" to "Mule".

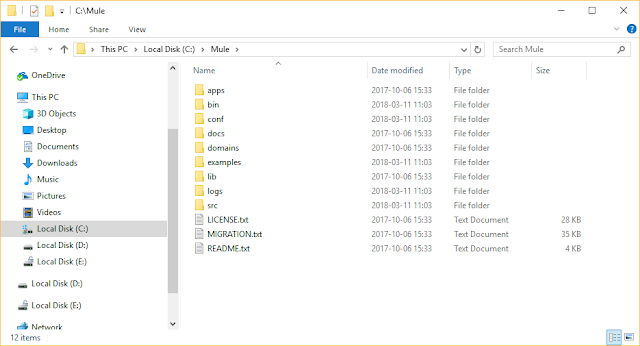
Copy the 'Mule' directory to the C: -drive. This is what you should see now:


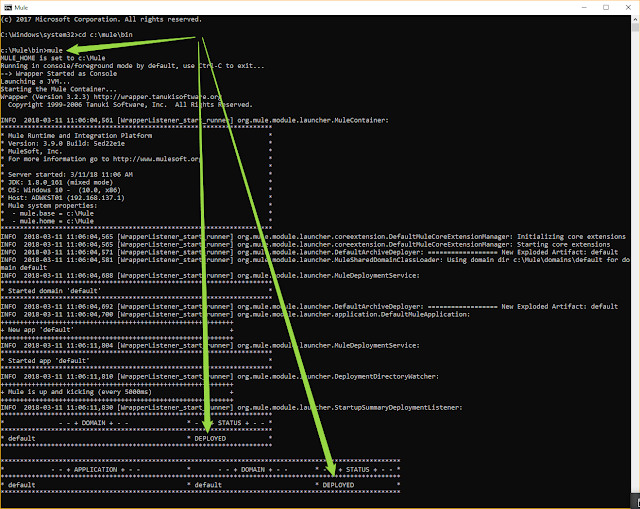
Run CMD as Administrator and "cd c:\mule\bin".
Enter command "mule". Mule should start.


Use "CTRL+C" to stop Mule. Terminate batch job (Y/N)? y

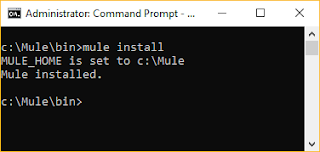
To install Mule as a service, enter the "mule install" command.


To be able to run Mule as a service, you'll need an account for Mule.

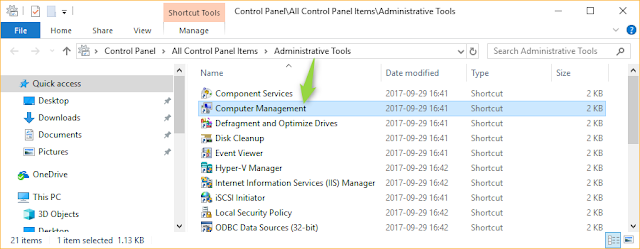
Go to Computer Management


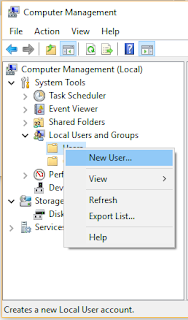
Right click on the Users directory and select "New User"


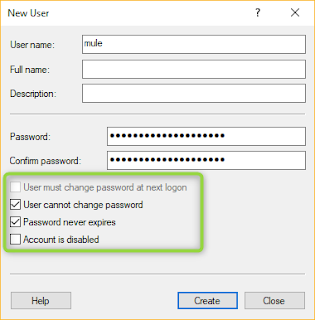
Create a new user. Note the checkboxes.


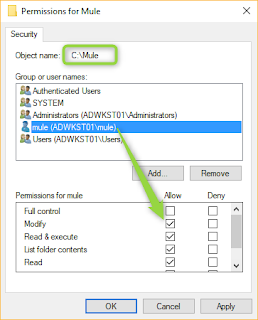
Grant 'Modify' rights for the 'mule' user to the C:\Mule -directory.


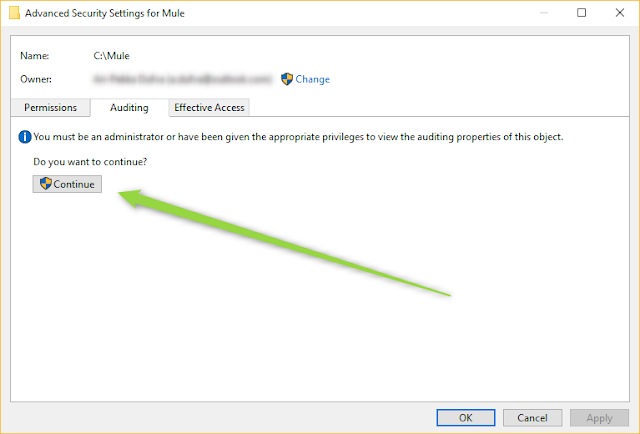
If you get errors, go to the Advanced settings. First go to Auditing and click Continue. This will make you run the settings as an administrator.


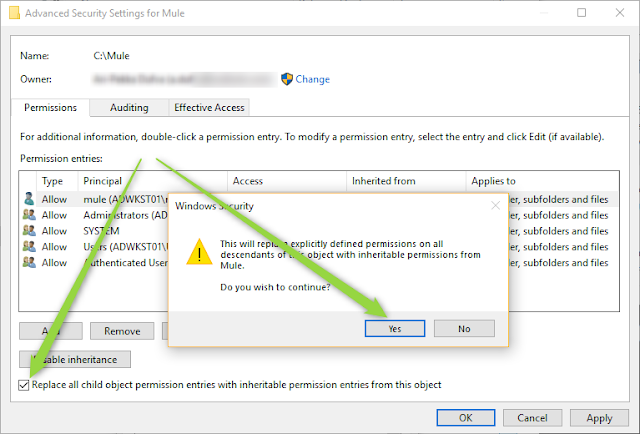
Then replace the permissions in the sub directories.


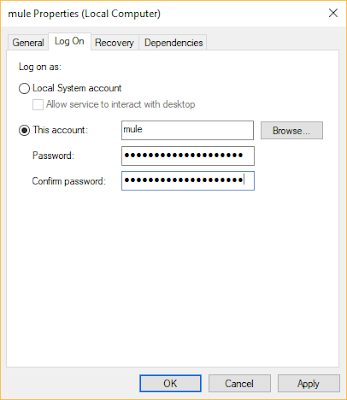
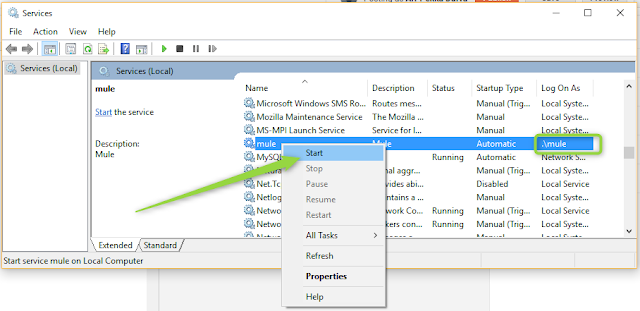
Go to the 'mule' service and set the account and the password.


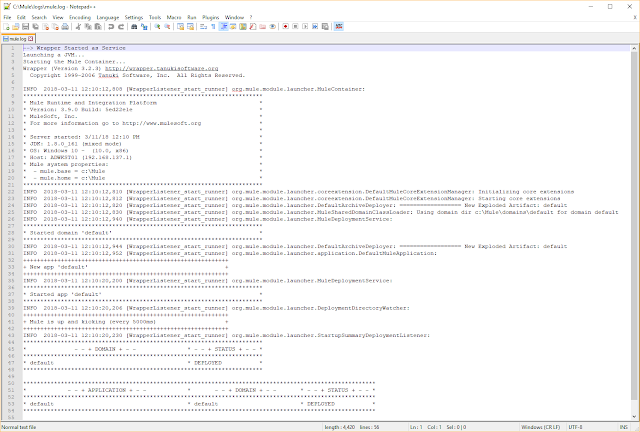
After a few seconds check the "C:\Mule\logs\mule.log" file that Mule is live and kickin'.


Notes


If you run into issues remember that the 'mule' user must have rights to directories where integrations are pointing. You could put the 'mule' user to the administrators group for example when testing if local directories are involved. In a 'real life' scenario the Mule service should run under a service account defined in AD, but that's a different story.