Overview
Instructions
Use the test project (https://goo.gl/e3tVjG) as a template. First define the input pattern to be (.*)\.xml$
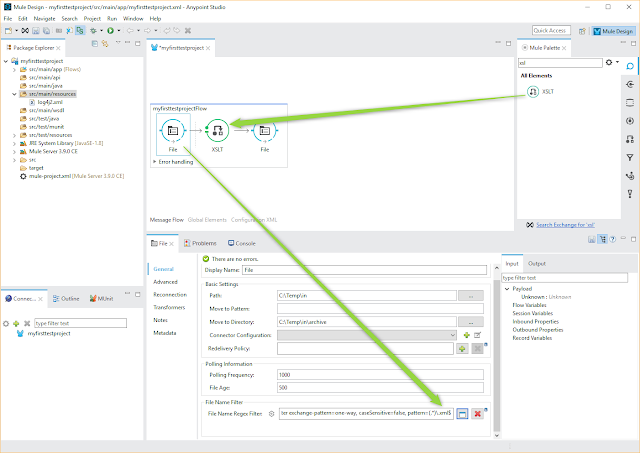
Search and drag an XSLT element between the File elements.
Change the inbound File element filter to (.*)\.xml$
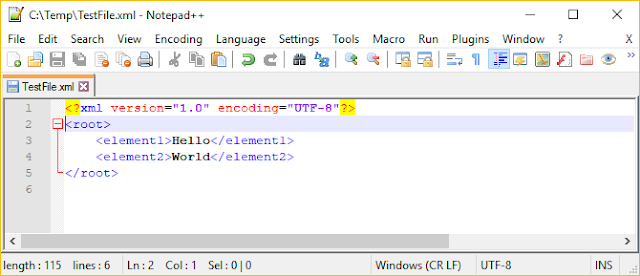
Create a test XML file.
<?xml version="1.0" encoding="UTF-8"?>
<root>
<element1>Hello</element1>
<element2>World</element2>
</root>
Create an XSL file by name TransformationTest.xsl
<?xml version="1.0" encoding="UTF-8"?>
<xsl:stylesheet version="1.0" xmlns:xsl="http://www.w3.org/1999/XSL/Transform" xmlns:fo="http://www.w3.org/1999/XSL/Format">
<xsl:output method="text" encoding="UTF-8"/>
<xsl:template match="/">
<xsl:value-of select="/root/element1"/>
<xsl:text>;</xsl:text>
<xsl:value-of select="/root/element2"/>
</xsl:template>
</xsl:stylesheet>

Right click on the src/main/resources directory and select Import. Select "File System"
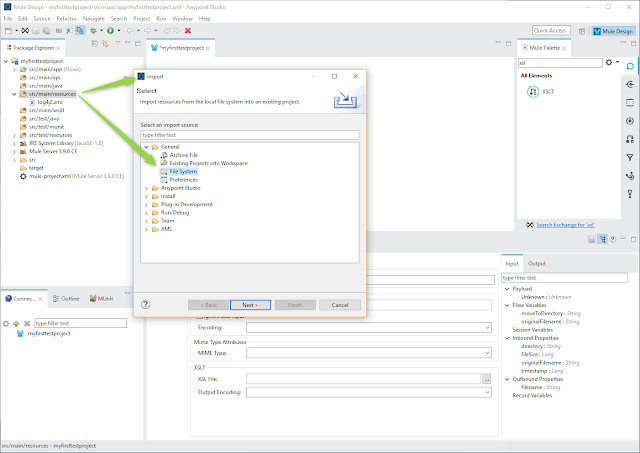
Import the XSL -file.
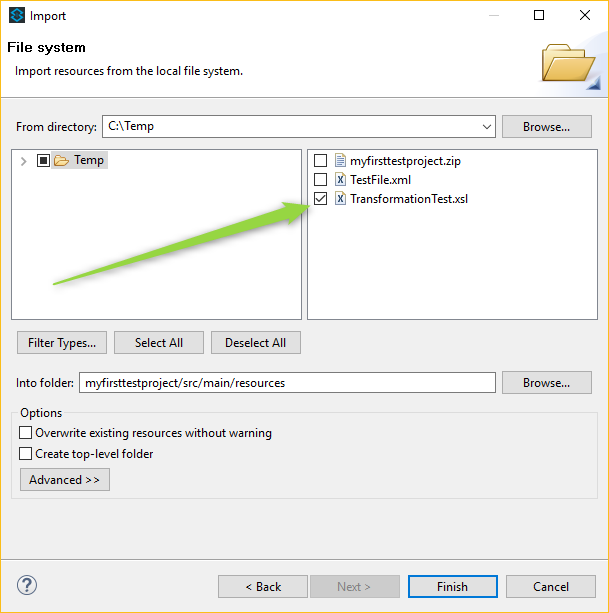
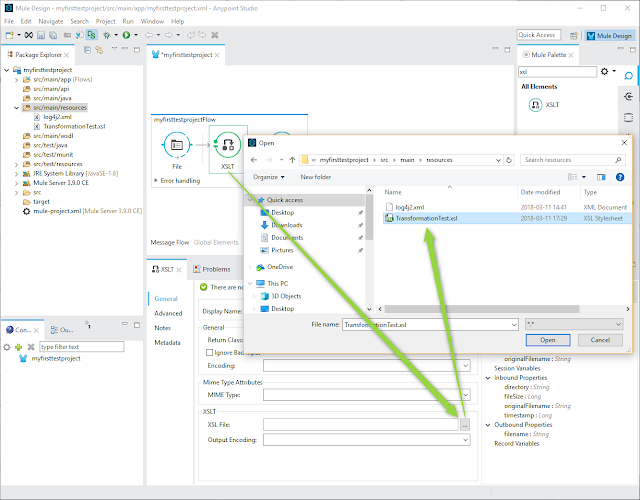
In the XSLT elment select the XSL -file.
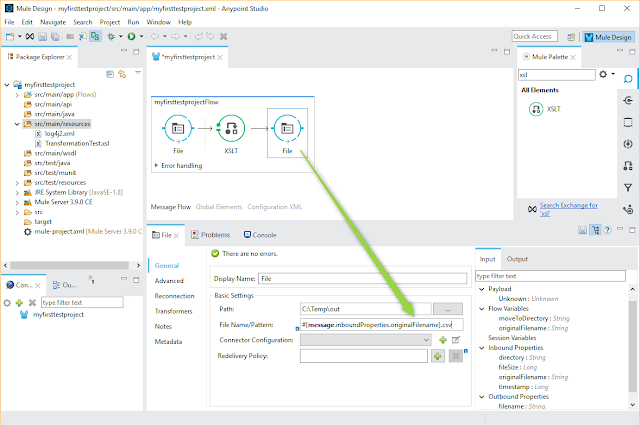
To the outbound File element define #[message.inboundProperties.originalFilename].csv as the File Name/Pattern.
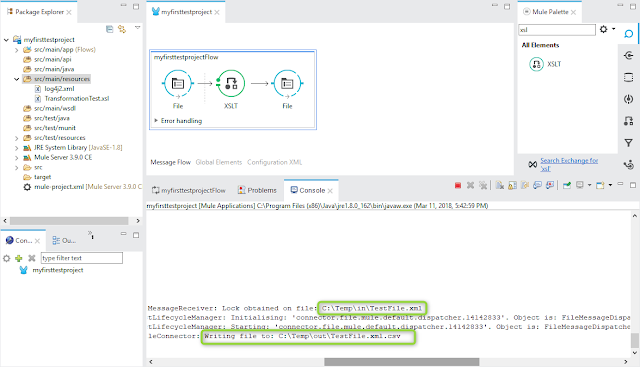
Save the project and run it (right click on the myfirsttestprojectFlow abd sekect "Run project..." ).
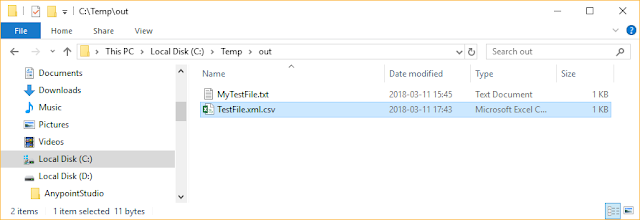
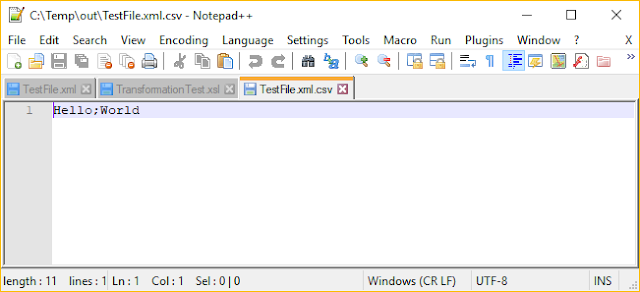
Put the test XML file to the C:\Temp\in -directory. Mule reads in the file, makes the transformation and creates a CSV file.
This information is really awesome thanks for sharing most valuable information.
ReplyDeletemule 4 training
learn mulesoft